
- Home
- Instruments
- Gear
- Recording
- Lessons
- Reviews
- Blog
Proper placement of speakers is one of the hottest and most important topics regarding studio monitors. We would love to tell you that the whole thing is overblown and that it’s actually easy, but we would be lying. Good positioning of studio monitors is imperative if you expect those monitors to of any use. This applies to both your mediocre monitors professional quality ones. Today we are going to give you the basics of studio monitor placement and the idea behind this process. By the time you are done reading this guide, you should have a good understanding of why proper placement is important.
Before we can get into proper monitor placement, we need to understand why proper placement is necessary in the first place. The whole thing has to do with physics and sound wave propagation through space. As you probably know, sound can be viewed as waves of different frequencies. Frequency is what dictates the length of a wave, where higher frequency sounds have shorter wave length, while low-frequency sounds have long wave lengths.
A good way to visualize what happens when you put a speaker into a room is to imagine a swimming pool. Let’s say you have a bird’s eye view of this imaginary pool, and you suddenly decide to drop a rock right in the middle of it. As the rock hits the water, it creates ripples. Ripples propagate over the surface of water freely until they reach the edges of the pool. This is when they start bouncing and coming back. A similar thing happens with sound coming from your monitors.
A standing wave is a phenomenon that occurs when the length of a sound wave is the same as the length of the room. The issue with this phenomenon is that it negatively affects the volume and quality of frequencies which cause it. Large studios don’t really have to worry too much about standing waves because the frequencies where this occurs is often too low for it to matter. However, smaller studios are not so lucky.
One way to deal with standing waves is to first select the right size of speaker for your studio and to properly position the speakers. Chances are you won’t completely eliminate standing waves, but you can reduce their effect significantly. Some of the better models out there come with features that allow you to manipulate problematic frequencies. You can check out some of them in our list of top studio monitors.
Placement and positioning of studio monitors begin with the survey of your studio space. It is highly recommended that the shape of your studio is a cuboid. Cube shaped spaces are the worst simply because you no longer have to deal with one, but two standing waves in the same frequency range.
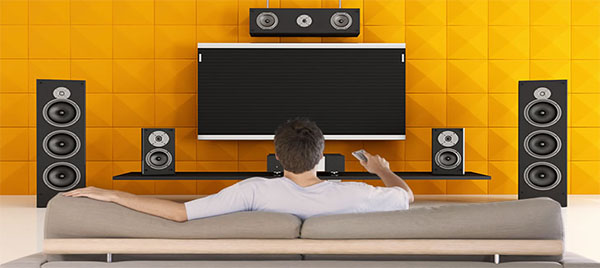
The first thing you want to do is measure the length of your studio and find a point that is center relative to width, and some 38% of the way from your front wall. By doing this, you have found your optimal listening point. This is where you want your chair to be. From here on out, it becomes a bit easier.
Monitor speakers are usually near field in nature, meaning that their sweet spot occurs at about 1 to 2 meters of distance from the speaker. The exact distance will be listed in your user manual. Measure the required distance from your listening point and mark that location.
Up next comes finding the optimal angle for cabinets. You want each cabinet to be pointed at you so that you, the left and right cabinet form an equidistant triangle. In other words, 60 degrees of angle between the speakers. Cabinets need to be level with your head, which might require you to get stands. If you can achieve the required angle on your desktop, make sure to use dampening pads. This will neutralize any vibrations coming from and going into the speaker. Point the tweeters on each cab so that they shoot directly into your ears.
Another thing that requires consideration is the distance of the speaker’s back panel and the wall behind it. Most modern near field studio monitors have rear firing bass reflex ports. Placing those ports near a wall can have a negative impact on your monitor’s low-end performance. There are several schools of thought on how far the speaker needs to be away from the wall, but 2.2 meters is generally a distance that works for most models.
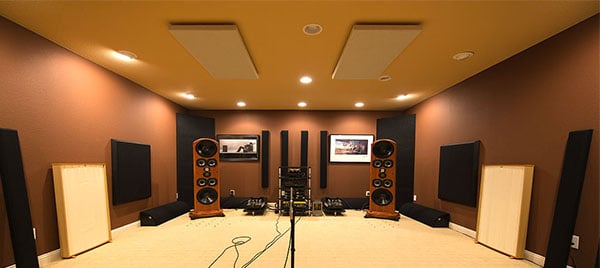
At this point, your studio monitors should be fairly well positioned. However, there are more things you can do to get that performance even better. One of those things is an acoustic treatment of your studio. This process entails applying acoustic isolation to your walls in an effort to dampen specific frequencies. Unfortunately, this is a blend of science and pure art that depends on numerous factors. However, taking a piece of isolation foam that is slightly larger than your monitor’s back panel, and applying it to a wall directly behind the monitor can help. Due to the pure complexity of proper acoustic treatment, this is something you should do as a last resort. Chances are that your monitors will work just fine if you follow the basic positioning guidelines we’ve shown you above.
Studio monitor placement and positioning is something you will have to deal with. The whole process can be complicated, but doing it properly leads to awesome results. What we have shown you in this short guide is the basic set of rules you can apply to most studio monitors. To find the best solution for your specific speakers, you might have to experiment a little. Don’t get discouraged if you run into trouble with this. There are people whose only job is to design studios with regard to acoustic treatment and monitor positioning. It’s hard, but it’s definitely doable.
Reader Interactions